My external hard drive suddenly shows its partition as RAW, and I can’t open any of my files. It has important photos, work documents, and backups that I really need to recover. I’m looking for the safest way to recover data from a RAW partition on an external hard drive without making things worse.
When Windows labels a partition RAW, I would not hit Format. I did that once on an old backup drive years ago and regretted it fast. RAW usually means Windows lost track of the file system. It does not mean your files are gone.
The first thing I’d sort out is simple. Are you trying to save the data, or are you trying to make the partition usable again. If the files matter, I’d ignore repair attempts at first and pull data off the drive before touching anything else.
This is the order I’d follow:
- Do nothing to the RAW partition yet.
- Copy out the files to another disk.
- Try fixing the partition after the data is safe.
- If repair fails, rebuild the partition and format it.
Get the files off first
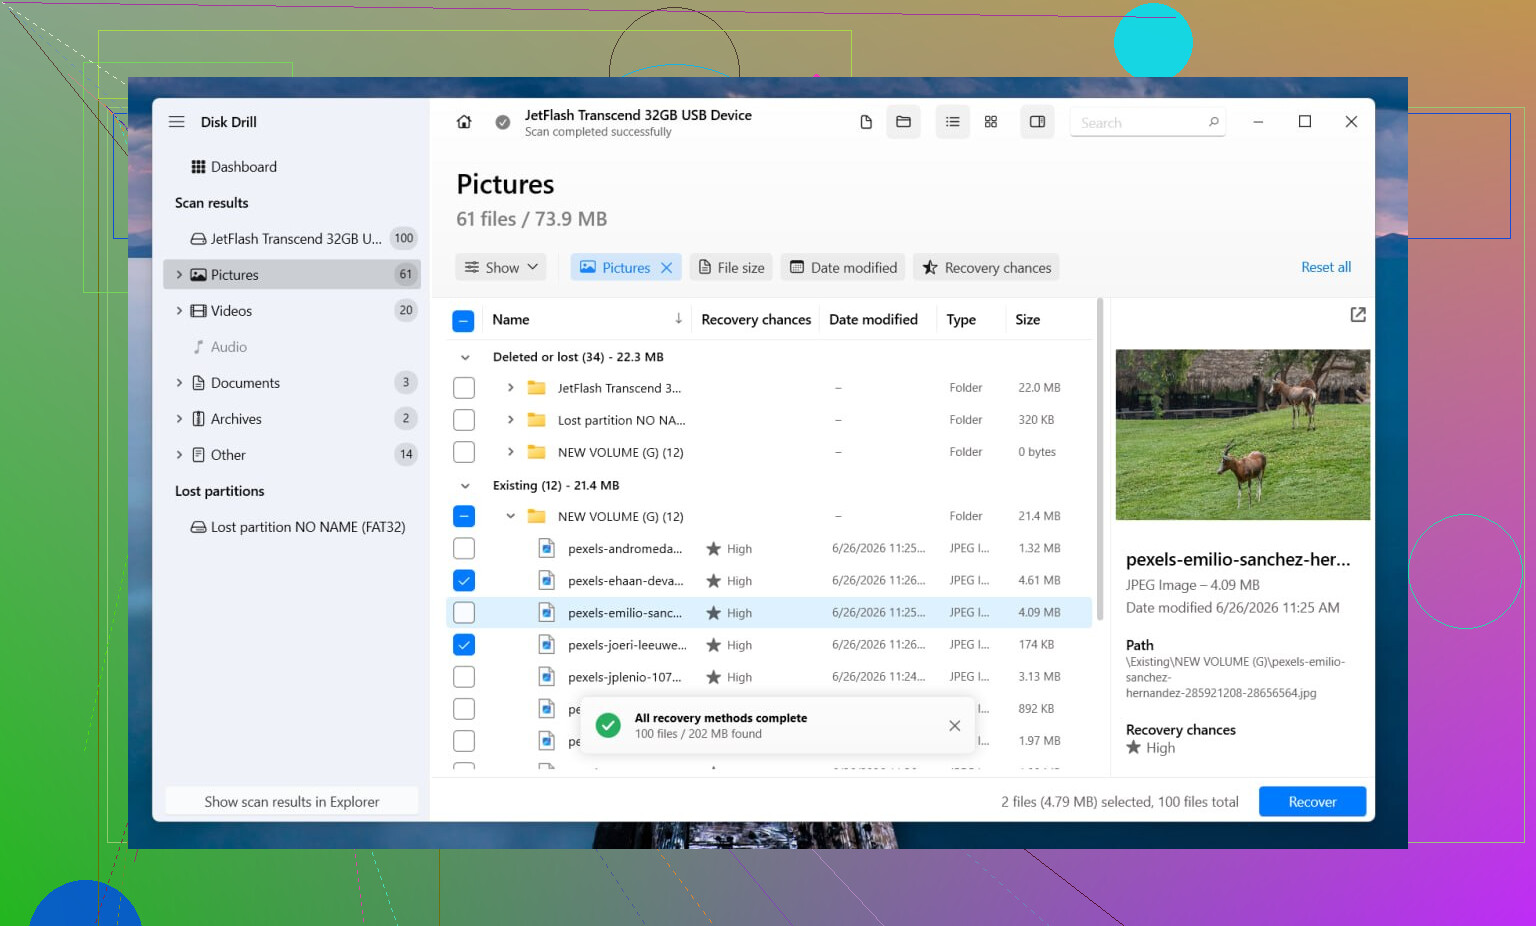
I’d start with Disk Drill. I used it on a messed up USB SSD and it saved me a lot of trial and error. What I liked was how it tries multiple recovery methods without making you babysit every step. When some file system info is still there, it often pulls files back with folders and names intact. When the file system is too far gone, it falls back to signature scans and searches by file type instead. Preview helps too. I always check a few photos, docs, or videos before I recover a pile of junk.
What I’d do:
- Install Disk Drill on a different drive, not the damaged one.
- Launch it and pick the RAW disk or partition.
- Click Search for Lost Data. On an external drive, use Universal Scan if it asks. I’d only switch to Advanced Camera Recovery for footage from a camera, dashcam, or drone.
- Let the scan finish. Don’t stop halfway unless the drive is acting up.
- Preview the files you care about.
- Recover everything to another drive.
If the disk keeps dropping offline, freezes Explorer, or starts doing weird stuff, I’d make an image first. Disk Drill has a sector-by-sector imaging option, so you work on the copy instead of stressing the original hardware. I’ve had one failing HDD get worse between scans, so yeah, I’d image first if the drive feels unstable.
After recovery, see if the partition is fixable
Once your files are safe somewhere else, then I’d try repair.
If the partition used to be NTFS, CHKDSK sometimes fixes file system damage or boot sector issues. If it was FAT32 or exFAT, I’d skip CHKDSK. It won’t do you much good there. I also would not run it before recovery, since it writes changes to the file system and I don’t like doing blind repairs while the data is still trapped on the drive.
If CHKDSK gets nowhere, I’d move to TestDisk. It looks rough, but it works more often than people expect.
- Open testdisk_win.
- Create a log.
- Select the problem drive.
- Accept the detected partition table.
- Choose Analyse.
- Run Quick Search.
- Use Deeper Search if the first pass misses it.
- If it finds the lost partition, choose Write, then reboot.
If TestDisk still comes up empty, I would stop there. I’ve seen people spend half a day stacking random repair tools and end up with a worse mess. At that stage, I’d open Disk Management, create a New Simple Volume, do a quick format, and move the recovered files back onto it.
Two extra things matter here.
If this is an SSD, I would not leave it sitting around for days before recovery. TRIM can wipe blocks in the background, and once that happens, recovery odds drop hard. I learned this the annoying way with a SATA SSD I thought I had time to deal with later.
And if the drive clicks, vanishes at random, or shows up only sometimes, I’d stop with home fixes. Those signs usually point to hardware failure. Every extra power cycle can make things worse. If the files are important and not replaceable, a pro recovery lab is the safer move.
1 Like
RAW on an external drive usually means file system damage, not instant file loss. So the safe goal is simple, recover data from a RAW partition on an external hard drive first, repair the drive later.
I agree with @mikeappsreviewer on one big point. Do not format first. I’d go one step further though. Before any scan, check SMART health with CrystalDiskInfo or Hard Disk Sentinel. If health looks bad, or the drive disconnects, slows to a crawl, or clicks, stop poking it. Clone it first with something like HDDSuperClone or ddrescue. Work from the clone, not the original. This matters more than people think.
If the drive stays stable, Disk Drill is a solid pick for RAW partition recovery because it handles damaged file systems well and its preview helps filter junk before recovery. Install it on your PC’s main drive, not the bad external. Save recovered files to a second healthy drive.
My order would be:
- Stop using the RAW drive.
- Check SMART.
- Clone first if health is poor.
- Scan with Disk Drill.
- Recover files to another disk.
- Only then wipe and reformat the external.
One small place I differ from @mikeappsreviewer. I would not rush into CHKDSK even on NTFS unless the data is already safe and the drive health is clean. I’ve seen CHKDSK turn a readable mess into an unreadble one.
If you want a quick visual explainer, this RAW drive recovery walkthrough covers the basic idea.
If the files are irreplaceable, family photos, business docs, client backups, and the drive shows hardware symptoms, a recovery lab is the safer move. DIY is for stable drives, not dying ones.

I’m with @mikeappsreviewer and @vrijheidsvogel on the big rule: do not format it yet. But I’d also avoid getting too excited with “repair” tools right away. RAW is often a file system problem, sure, but sometimes the real issue is the USB bridge, cable, or enclosure, not the actual disk.
So before recovery software, I’d test the drive in this order:
- Different USB port
- Different cable
- Different PC
- If it’s a removable enclosure, try another enclosure or SATA-to-USB adapter
I’ve seen drives show as RAW just because the enclosure was flaking out and feeding garbage to Windows. People jump into CHKDSK or partition writes way too fast and make a bad sitution worse.
If the drive still shows RAW everywhere, then yeah, go into recovery mode, not repair mode. Disk Drill is a sensible choice for RAW partition recovery on an external hard drive because it can scan past damaged file system metadata and still pull back photos, docs, and other files. I’d recover to a totally separate drive only.
One thing I slightly disagree on with the usual advice: TestDisk is powerful, but if you’re not comfortable reading partition structure stuff, it’s easy to get nervous and click the wrong thing. For non-tech users, file recovery first is usually the less risky path.
Also, if your photos are super important, sort recovered results by file type first so you can verify the irreplaceable stuff early. Don’t wait till the end to find out half the JPGs are corrupt. Been there, not fun.
If you want a simple step-by-step read on external drive partition recovery, this is decent: how to recover a lost partition on an external hard drive
Short version: rule out enclosure/cable issues, recover files with Disk Drill, then wipe/reformat only after the data is safe. If the drive is clicking or disconnecting, stop DIY stuff completley and go lab route.
One extra angle nobody’s stressed enough: check the partition layout itself before doing heavy recovery. Sometimes the file system is fine-ish, but the partition entry got mangled, so Windows calls it RAW. In that case, a read-only partition tool can tell you whether the volume boundaries still look sane.
I slightly disagree with jumping straight into deeper repair scans unless the drive is stable and the partition size still matches what it used to be. If the shown capacity is suddenly wrong, that can point to translator, enclosure, or firmware weirdness, not just file system damage.
My approach would be:
- verify the drive reports the correct full size
- check whether the partition start/end looks normal
- if that looks off, avoid writing anything
- recover files first with Disk Drill
- only after recovery, think about rebuilding the partition
Disk Drill pros:
- easy preview for photos/docs
- good at mixed file system + signature scanning
- less intimidating than low-level tools
Disk Drill cons:
- deep scans can return lots of duplicate/junk results
- best results depend on drive stability
- not the tool I’d trust for repairing partition structure itself
So I’m mostly aligned with @vrijheidsvogel, @reveurdenuit, and @mikeappsreviewer on “recover first,” but I’d add this: if the partition map is broken, “repairing the file system” is solving the wrong problem.