I accidentally deleted important files on my Windows 11 PC and emptied the Recycle Bin before realizing I still needed them. Some were work documents and family photos, so I’m trying to find the safest and most effective way to recover deleted files in Windows 11 without making things worse. I’d really appreciate advice on reliable recovery methods or software that actually works.
Hey,
I ran into this on Windows 11 a while back. A file looked gone for good, not in the Recycle Bin, gone after Shift+Delete. I figured it was done. It wasn't. On Windows, deleted usually means the system marks the space as free. The data often sits there until something else writes over it.
So before you throw recovery tools at it, I’d check the boring stuff first:
- Recycle Bin. Sounds obvious, still worth a look.
- OneDrive Recycle Bin, if your Desktop, Documents, or Pictures sync there.
- File History backups.
- Previous Versions on the folder where the file lived.
- Any other backup spot, external SSD, old USB drive, cloud account, second PC, whatever you used before.
Big thing here, stop writing to the drive if you can. Don’t install random apps on it. Don’t dump downloads onto it. Don’t move a pile of files around. Every write lowers your odds. SSDs are worse for this because of TRIM. Once TRIM does its thing, recovery gets ugly fast, sometimes impossible.
If none of the backups or bins have it, then I’d move to recovery software.
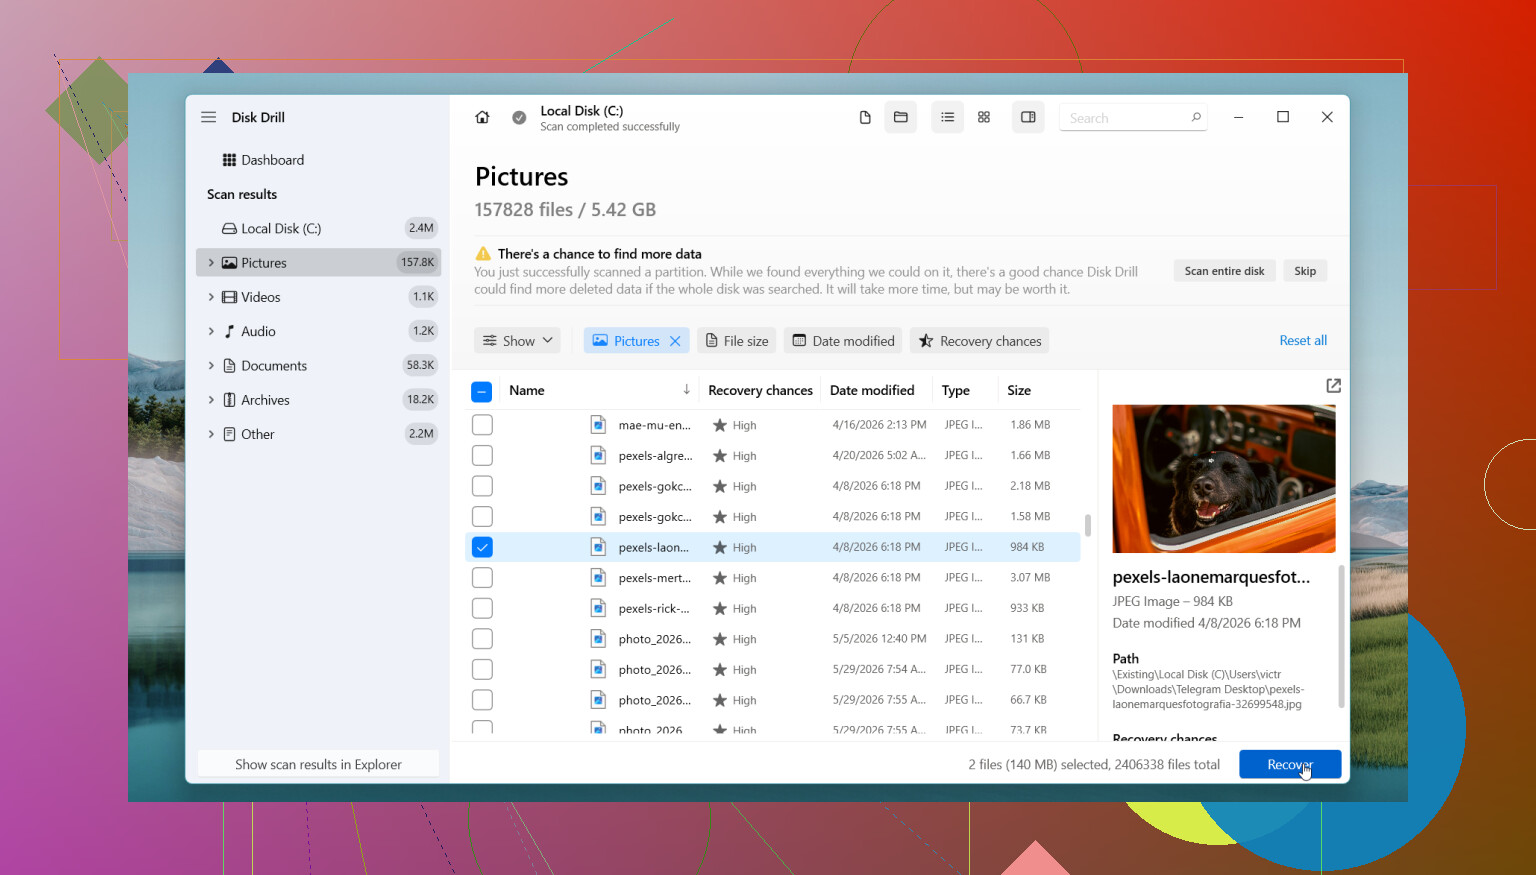
The one I had the least friction with was Disk Drill. I used it after trying a couple of clunky tools and it was a lot less annoying. It scans deleted files, formatted drives, and in some cases keeps the old names and folder layout, which saves a ton of sorting later.
What I did was simple:
- Install Disk Drill on a different drive, not the one with the missing files.
- Open it and pick the drive where the file was stored.
- Hit Search for Lost Data.
- Let the scan finish. Don’t rush this part.
- Use filters or search by file type or name.
- Preview what you find.
- Recover to another drive, never back onto the same one.
The free Windows version gives unlimited scanning and previewing, and recovers up to 100 MB. I found that useful because you get proof first. If your file shows up and previews fine, you know where you stand.
If you want a free route, PhotoRec works. I’ve used it too. It pulls back a lot, but the results are messier. Filenames are often gone, folders too, so you end up digging through a pile of recovered stuff. Good tool, rougher experience.
There’s also a point where I’d stop doing this yourself.
- The drive clicks, grinds, or makes any new noise.
- Windows stopped seeing the drive.
- The drive drops off randomly during use.
- The SSD or HDD has physical damage.
- The files matter enough where one bad move is a problem.
- Recovery software turns up nothing useful.
When hardware starts acting weird, home attempts sometimes make it worse. I’ve seen people keep rescanning a failing disk until it quits for good. If the data matters, a recovery shop is the safer move.
So yeah, permanent delete in Windows 11 is not always permanent right away. Check backups first. Keep use of the drive to a minimum. Then scan it with something sensible. If you move fast, your odds are usuallly better.
2 Likes
Stop using the PC first. That matters more than people think. Every browser tab, update, and install writes new data.
I agree with @mikeappsreviewer on one part, recover to a different drive. I disagree a bit on PhotoRec as a first free pick for normal users. It works, sure, but sorting 5,000 renamed files is a pain.
What I’d do on Windows 11:
-
Check if the files were in a work app cache.
Office, Adobe, and some photo apps keep temp or autosave copies.
Look in:
C:\Users\YourName\AppData\Roaming
C:\Users\YourName\AppData\Local -
Search by file extension, not filename.
Use Explorer search for .docx, .xlsx, .jpg, .png in the folders where they used to live. Sometimes the file survives with a weird name. -
If it was on an SSD, move fast.
TRIM cuts recovery rates hard. On HDDs, recovery odds are often better if you stopped writing early. -
Run Windows File Recovery if you want a Microsoft option.
It is free, command line only, and a bit annoyng, but it avoids random sketchy apps.
Example:
winfr C: E: /regular /n \Users\YourName\Documents*.docx
That pulls from C: and saves to E:. -
If you want the easier route, use Disk Drill.
It’s one of the cleaner tools on Windows 11 for deleted file recovery. Better previews. Easier filtering. Faster to check family photos before restoring a pile of junk. Install it on another drive or a USB stick if possbile.
Also, if these are family photos from a phone import, check the phone itself, SD card, messaging apps, and email attachments. People miss those copies all the time.
If you want a clean walkthrough, this deleted files recovery guide for Windows 11 is useful:
watch this Windows deleted files recovery tutorial
If the drive starts clicking, disappears, or freezes during scans, stop. Software won’t fix failing hardware.

One thing I’d add that @mikeappsreviewer and @kakeru only touched on sideways: check whether the files were deleted from a non-system folder with indexing off or from an external drive/card. That changes the odds a lot. If the photos were on an SD card or USB drive, stop using that device too, not just the PC. People forget that part and keep plugging it in, then Windows writes thumbnails and metadata all over it.
I also would not spend too long digging through AppData unless you know the app involved. That can turn into a giant time sink real fast.
My order would be:
- Look for app-specific recovery inside Word, Excel, Adobe, Photos.
- Check if the photos still exist on the source device, phone, SD card, camera storage.
- If it was an HDD, your chances are decent if you stopped quickly.
- If it was an SSD, act fast and keep expectations realistic.
- If no backup exists, use Disk Drill first because previewing recovered files matters a lot for family photos and documents. That saves you from restoring a mountain of junk.
- If the drive health looks sketchy, stop DIY.
Also worth reading: best Windows 11 file recovery advice for permanently deleted files
Biggest mistake people make is panicking and trying 6 tools back to back on the same drive. That can make a bad situation worse, ngl.
One angle I’d add beyond what @kakeru, @jeff, and @mikeappsreviewer said: check Windows Search index leftovers and thumbnail cache clues. Not for restoring the actual file, but for figuring out exact names, dates, and folders before recovery. That makes any scan way less chaotic.
A couple of useful places:
C:\Users\YourName\AppData\Local\Microsoft\Windows\Explorer- Search for
thumbcache - Recent files lists inside the app you used
- Quick Access in File Explorer
If the docs were opened recently, Word or Excel may still show the path history even if the file is gone. That helps target recovery instead of scanning blindly.
I slightly disagree with spending too much time on broad extension searches right away if the drive is an SSD. Time matters more there. I’d identify the original folder, then do one solid pass.
On Disk Drill specifically:
Pros
- easy previews
- keeps folder structure more often than some free tools
- good filtering for photos and docs
- less painful for normal users
Cons
- free recovery cap on Windows
- deep scans can return lots of junk
- not magical if TRIM already cleared an SSD
- still best installed and recovered to another drive
My take: if the files are valuable but the drive is healthy, Disk Drill is a sensible first scan. If the drive is unstable, stop software attempts and image the drive first or go pro. Repeated rescans are where people burn their chances.