My NTFS drive suddenly shows up as RAW after an unexpected shutdown, and I can’t open the partition or access important files stored on it. I’m looking for help with safe NTFS partition recovery steps, recommended tools, and what to avoid so I don’t make the data loss worse.
If a drive suddenly shows up as RAW, I would not try to turn it into NTFS right away. First thing I’d do is pull off anything I care about. Windows pushes the format prompt because it no longer reads the file system, not because your stuff is gone for good. I’ve seen drives keep the full partition and file data while NTFS was too damaged for Windows to read it.
The order I’d stick with is simple. Recover first. Mess with repairs later.
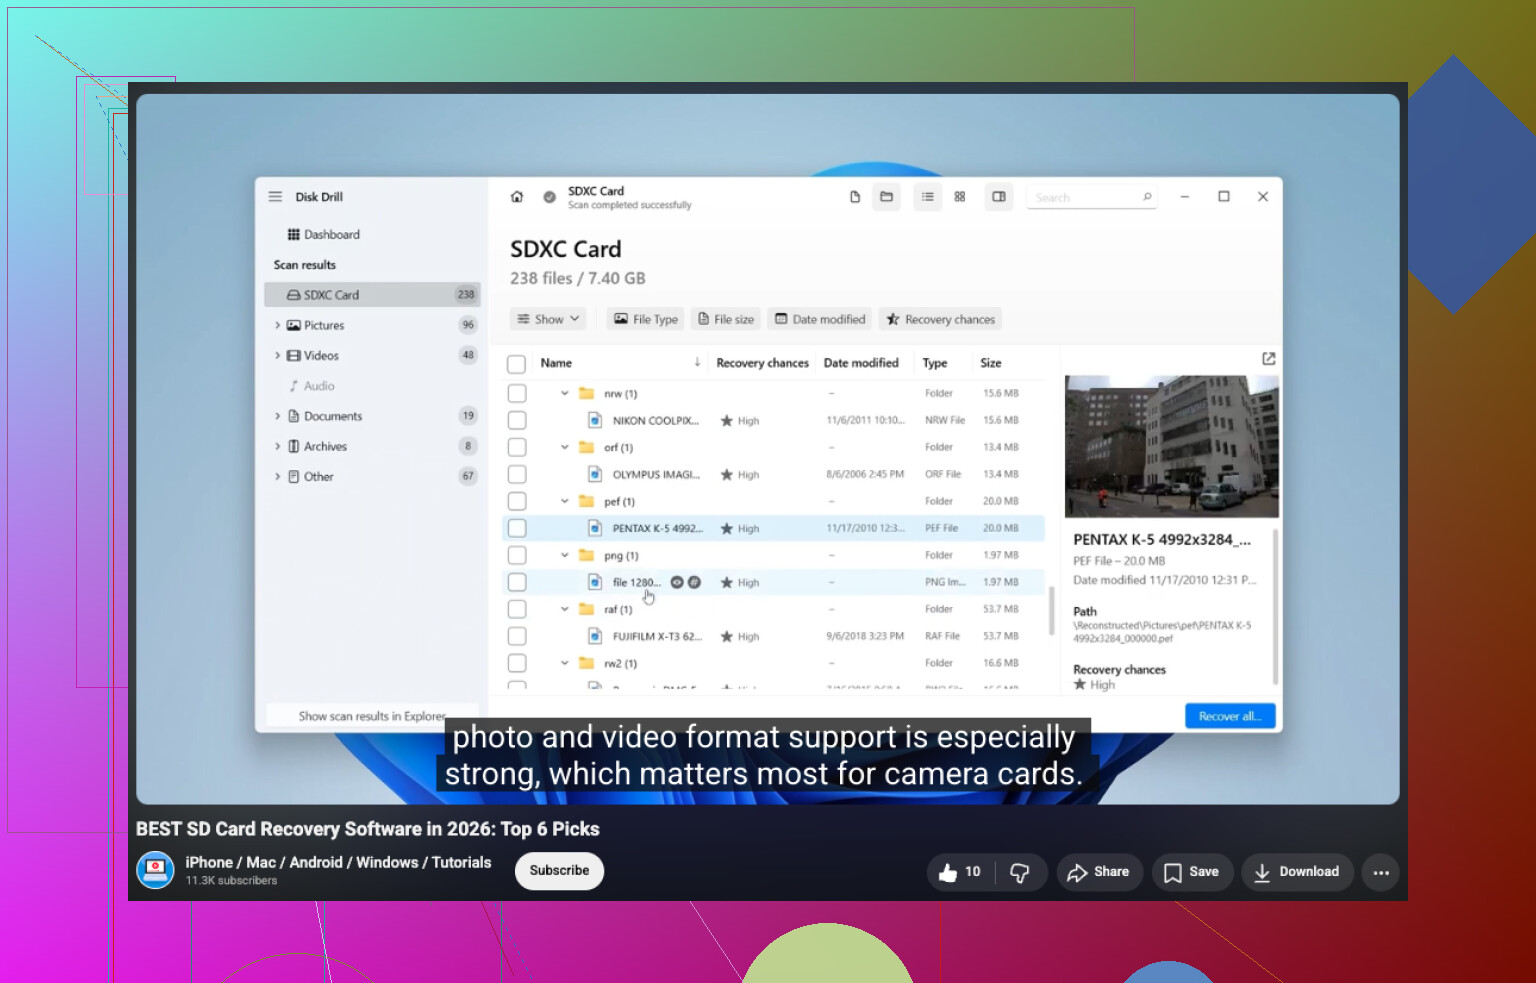
If the drive still reports the expected size, I’d scan it before touching anything else. Disk Drill is the easy starting point. It tends to spot RAW partitions on its own and runs a few recovery methods in one pass, which saves time. Pick the RAW disk, run the scan, wait it out, then go through what it finds. I liked being able to preview files before saving them, photos, docs, videos, the usual. It gives you a quick gut check on whether the files are still usable. Save recovered files somewhere else. Don’t write them back to the same RAW drive, even if you’re tempted to keep things tidy.
If Disk Drill comes up short, I’d test a second tool before doing any repair work. UFS Explorer sometimes finds directory structure or files other tools skip. DiskGenius is also worth a look if you think the partition layout itself got messed up, since it handles partition recovery along with file recovery. I’d compare scan results side by side and then decide what to keep.
Once your files are stored on another drive, then I’d deal with the RAW partition.
If you only want the disk usable again, format it to NTFS.
If the partition table got damaged and the data still seems present, try restoring the partition instead of wiping it.
Use CHKDSK only after recovery, and only if this looks like light NTFS corruption. It repairs file system issues. It is not a file recovery tool.
If SMART alerts show up, or you’re seeing bad sectors and repeat read errors, I’d stop trusting the drive and replace it.
The main screw-up I’d avoid is firing off repair commands too early. Anything which writes changes to the file system risks making recovery worse. Grab your files first. After tht, repair, restore, or reformat the disk based on what you found.
1 Like
First step, stop using the drive. No scans, no repair commands, no format click. An unexpected shutdown often corrupts the NTFS boot sector or MFT, and every write lowers recovery odds.
I partly agree with @mikeappsreviewer on waiting before repairs, but I would add one step before file recovery. Check the drive health first. Read SMART with CrystalDiskInfo or Hard Disk Sentinel. If you see reallocated sectors climbing, pending sectors, or read errors, clone the disk first with ddrescue or HDDSuperClone. Recover from the clone, not the original. This matters more than people think.
If SMART looks clean, then scan the RAW partition with Disk Drill. It’s a solid pick for RAW NTFS recovery because it often finds the old file system structure and lets you preview files. Save recovered data to another disk. Never back to the RAW one. If Disk Drill finds filenames and folders, your chances are prety good.
After recovery, test the partition structure with TestDisk. I’d use it before CHKDSK. CHKDSK writes changes and sometimes trashes what recovery tools still see. TestDisk is better if the partition entry or NTFS boot sector got damaged after the shutdown.
If you want more tool options, this roundup on top data recovery software for 2026 is worth a look.
Short version:
- Stop writes.
- Check SMART.
- Clone if unhealthy.
- Scan with Disk Drill.
- Try TestDisk for partition repair.
- Format only after your files are safe.
Do not rush CHKDSK. Thas the step people regret most.
My first step is actually a little different from @mikeappsreviewer and @viajantedoceu: I check whether the RAW result is logical corruption or a connection problem before I do anything heavy.
After a hard shutdown, I’ve seen NTFS partitions flip to RAW just because of a flaky USB bridge, bad SATA cable, or weak enclosure power. So before scans, I’d:
- reconnect the drive directly if possible
- try another cable/port/PC
- check Disk Management to confirm the partition size still looks right
- look in Event Viewer for disk/controller errors
Why bother? Because if Windows is misreading the device layer, recovery software results can be messy or incomplete.
If the partition still shows RAW everywhere, then yeah, switch to recovery mode. I would not run CHKDSK yet, and I’m slightly more cautious than both of them about TestDisk repairs on the original disk unless I already have either a clone or the important files copied out. Partition fixes can work, but if the issue is deeper NTFS metadata damage, you can make the situation uglier fast.
At that point, Disk Drill is a very reasonable first scan because it handles RAW partitions well and lets you preview recoverable files. If previews open normaly, that’s a strong sign the data is still there. Recover to a different drive only.
One more thing people skip: take a sector-by-sector image if the data matters a lot. Even healthy-looking drives can go downhill after a bad shutdown.
Also, if you want more background reading, this thread on RAW to NTFS drive recovery steps and safe conversion advice covers similar cases.
So my order is:
- verify hardware path
- image the drive if important
- scan with Disk Drill
- recover files elsewhere
- only then think about repair/reformat
That extra hardware check sounds boring, but it saves time more often than poeple think.
